CREATING A DREAMWEAVER SITE DEFINITION
This page is no longer current for questions contact the IT Service Center, 413-585-4487 or email 4its@smith.edu.
Follow the steps below to create a Dreamweaver site definition:
- Open Dreamweaver.
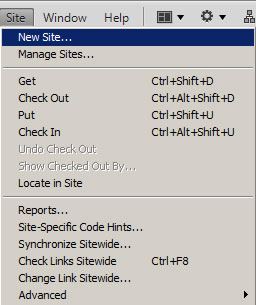
- Click on the Site menu and choose New Site.
- The Site Setup window will open with the Site category selected on the left.
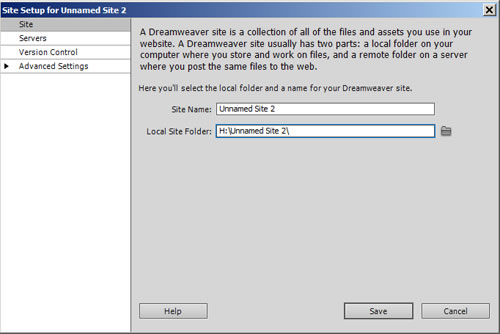
- In the Site Name field, enter a short name for your site.
- Click the Browse button (folder icon) at the end of the Local Site Folder field.

- Navigate to an existing folder on your H: or C: drive where you will store local copies of your site files, or create a new folder for this purpose.
- Open the folder and click Select. The correct path will appear in the Local Site Folder field.
- Click on the Servers category on the left.
- In the right part of the window, click the + icon at the bottom to add a server.
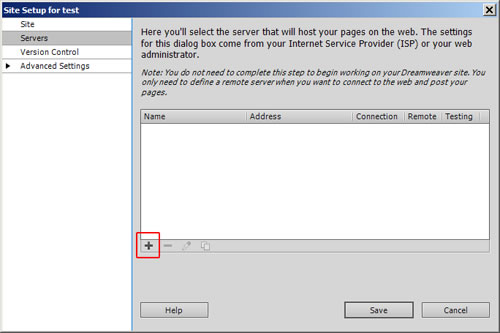
- The Basic server settings window will open.
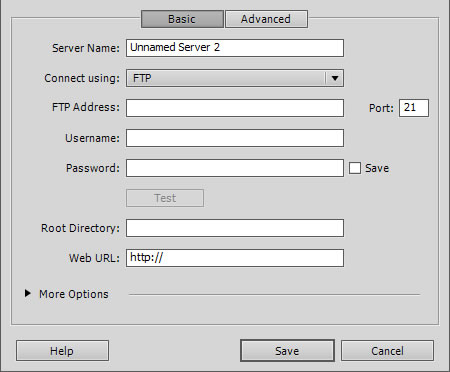
- Enter the following connection information:
- If your site is on the main Smith web server, in the Server Name field, enter: www.smith.edu
If you are connecting to a different web server (e.g., sophia.smith.edu), enter that as your server name.
- In the Connect using drop-down, choose SFTP.
- In the SFTP Address field, enter: www.smith.edu
If you are connecting to a different web server (e.g., sophia.smith.edu), enter that as your SFTP address.
- In the Username field, enter the username for the account on the web server.
- In the Password field, enter the password for the account on the web server.
- In the Root Directory field, enter the path to your account files on the web server.
The path typically begins with /home, followed by the first letter of the account name, followed by the site name, all separated by slashes. For example, the path to mysite is: /home/m/mysite/
- To test the username and password, click Test. Dreamweaver will let you know whether the connection was successful.
- If your site is on the main Smith web server, in the Server Name field, enter: www.smith.edu
- If you don't want to enable file check-in/check-out, click the Save button, then Save again, then Done. Skip to step 13.
- To enable file check-in/check-out, click the Advanced tab.

- Click the checkbox beside Enable file check-out and enter your own name and email address.
- When done, hit Save, Save, and Done.
- Click the checkbox beside Enable file check-out and enter your own name and email address.
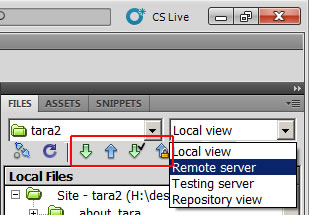
- Your local site folder should now appear at the top of the Local Files pane on the right side of the Dreamweaver window.
- To see the site files currently stored on the web server, choose Remote server from the drop-down menu above the file list.
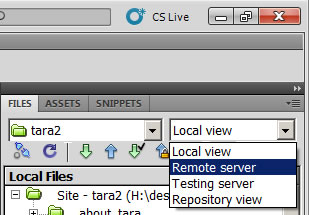
- You can now use the Get and Put arrows above the file list to transfer files from your local folder to the remote server and vice versa.