Create a Navigation Menu for Your WordPress Site
Create a Menu
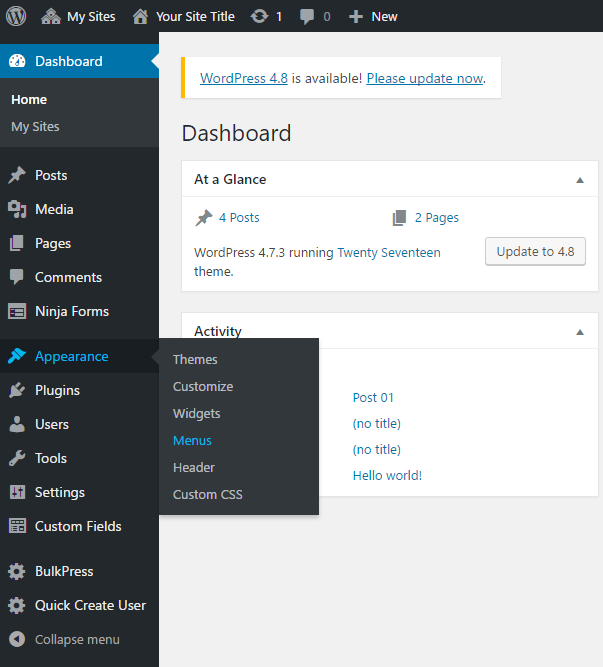
Navigate to the Dashboard of your site.
In the “Dashboard”, on the left side of the page, under the toolbar, click Appearance, then click Menus. The “Menus” page will open.
(Optional: If you already have a menu created on your site, skip this step.)
If this is the first time you are creating a menu for your site, on the “Menus” page, enter a name for your menu in “Menu Name”. Then, on the right side of the page, click Create Menu.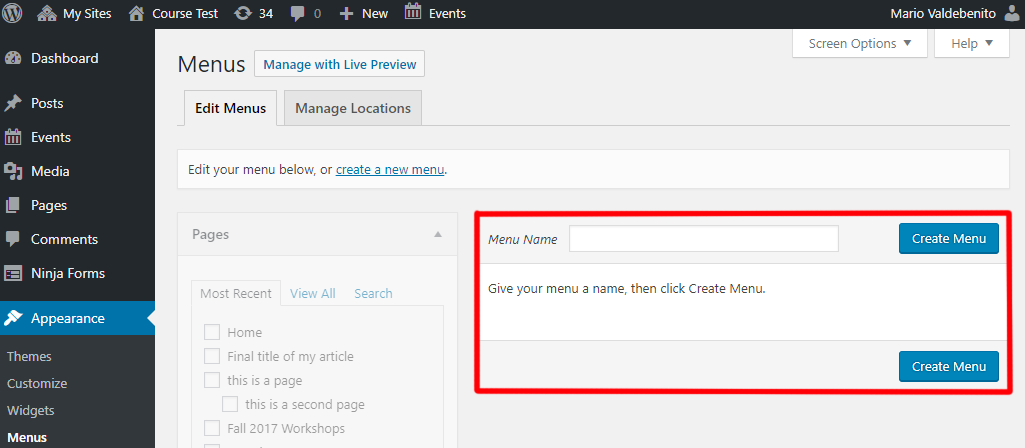
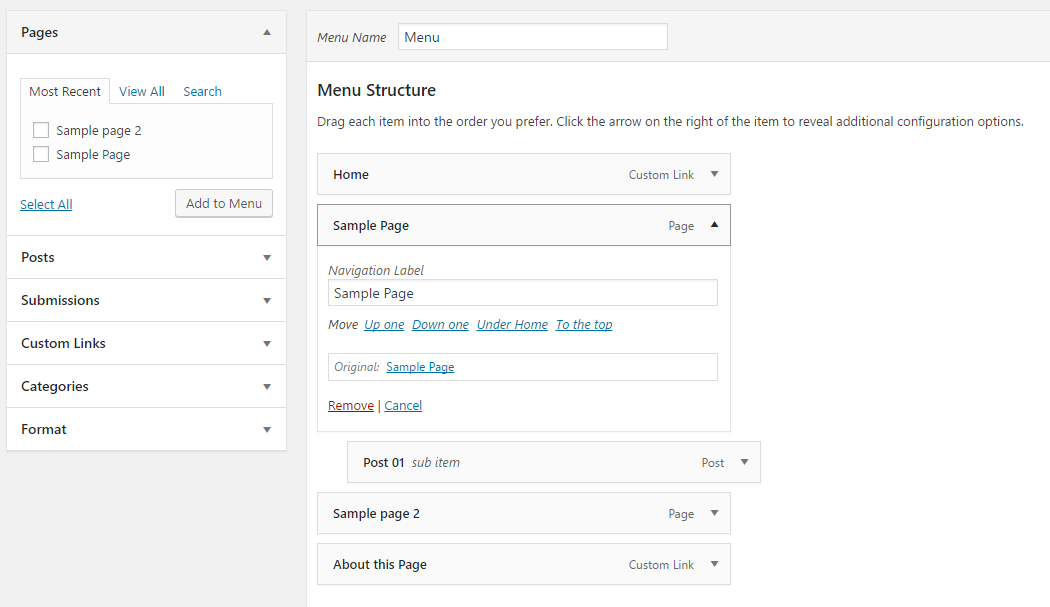
From the menu on the left side of the page, select the items you would like to add to your site menu. Then, click Add to Menu. The items selected will appear on the right side of the page, under the “Menu Structure” section.

To arrange menu items. You can click the arrows on the right side of each item. Then, select an action.
Note: To create submenus, select Under [Parent Item Name]. To undo submenus, select Out from [Parent Item Name].


Once you finish adding and moving the items in the “Menu Structure”, on the right side of the page, click Save Menu.
Use Multiple Menus
You can create multiple menus that can be used for top menus or sidebars.
On the “Edit Menus” tab, click create a new menu. Then, follow the instructions on the “Create a Menu” section above.
To edit the menu locations, create a second menu on the “Menus” page and change the tab to Manage Locations. The available “Theme Locations” will be listed below and the “Assigned Menu” will appear on the right.
From the “Assigned Menu” drop-down menu, select the menu you would like to use for each “Theme Location” row.
Note: Additional menus can also be created from this tab.
Once you have selected the menus to use, click Save Changes.
Delete Items from a Menu
Navigate to the Dashboard of your site.
In the “Dashboard”, on the left side of the page, under the toolbar, click Appearance, then click Menus. The “Menus” page will open.
In the “Menus” page, under the “Menu Structure”, find the item you would like to delete. In the item row, on the right side, click the arrow pointing down. The item options will be displayed below.
In the item options display, click Remove to delete the item from the menu list.
To confirm any changes, on the right side of the page, click Save Menu.