Most everything in Moodle is based on courses. A course is the center of your activity in Moodle. Students and instructors are given access to materials based on courses that they are enrolled in and the roles they are given in those courses. At Smith, most courses are created automatically by pulling data from Banner. So if you are teaching an undergraduate course at Smith that exists in Banner, there is most likely already a Moodle course ready to go with the Banner title and enrollments already set.
When you first arrive at a course in Moodle, you’ll see it is set up, but mostly empty.
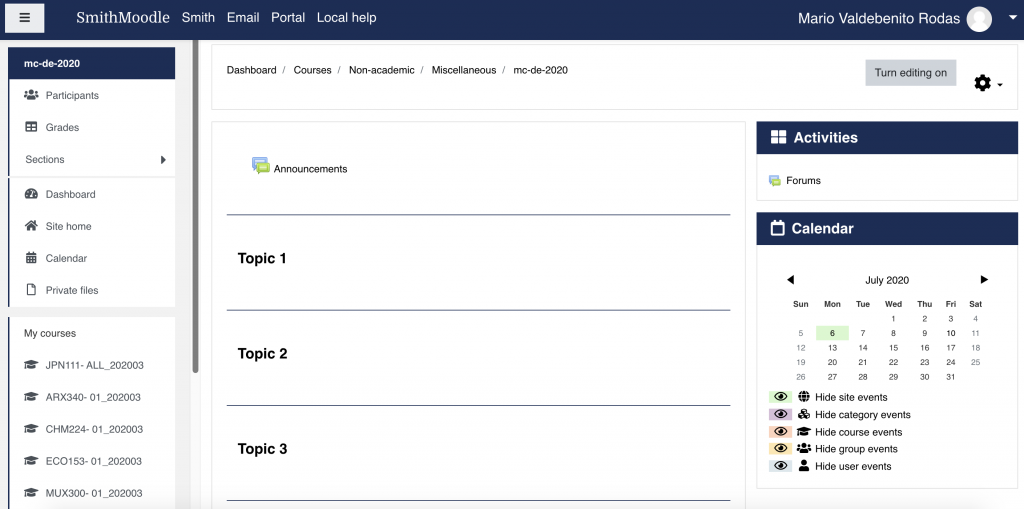
Most everything in your course fits somewhere within the basic structure you see here. A course has topics, and topics have resources (files or pages that students will read, listen to, or watch) and/or activities (things that students will do or turn in). In addition, you can add blocks to your course that add functionality such as a calendar or appointment scheduler.
Courses come set with 14 empty topics. You can use one per week if you like, or you can use them to set up major subject areas or types of materials. To edit the title of a topic, follow the steps below.
Most people starting out with Moodle first use it as a central place to post the syllabus, key course information, readings and other resources that students will use throughout the course. In this section, we’ll go over two different ways to add documents.
The easiest way is to just “drag and drop”.
You can add other types of resources – such as web links, folders full of documents, and custom pages by using the Add Resources dialogue.