Pages are static entries that work as stand-alone content holders. A page is often used for unique content like “About the Project” or “Contact information.” To learn more about when to use pages, see WordPress Posts vs. Pages.
Add a Page in WordPress
Add a Page
1
Navigate to the Dashboard of your site.
2
In the “Dashboard”, on left side of the page, in the toolbar, click Pages, then click Add New.
3
In the first blank space, enter the page title. In the main blank space, enter your page body content.
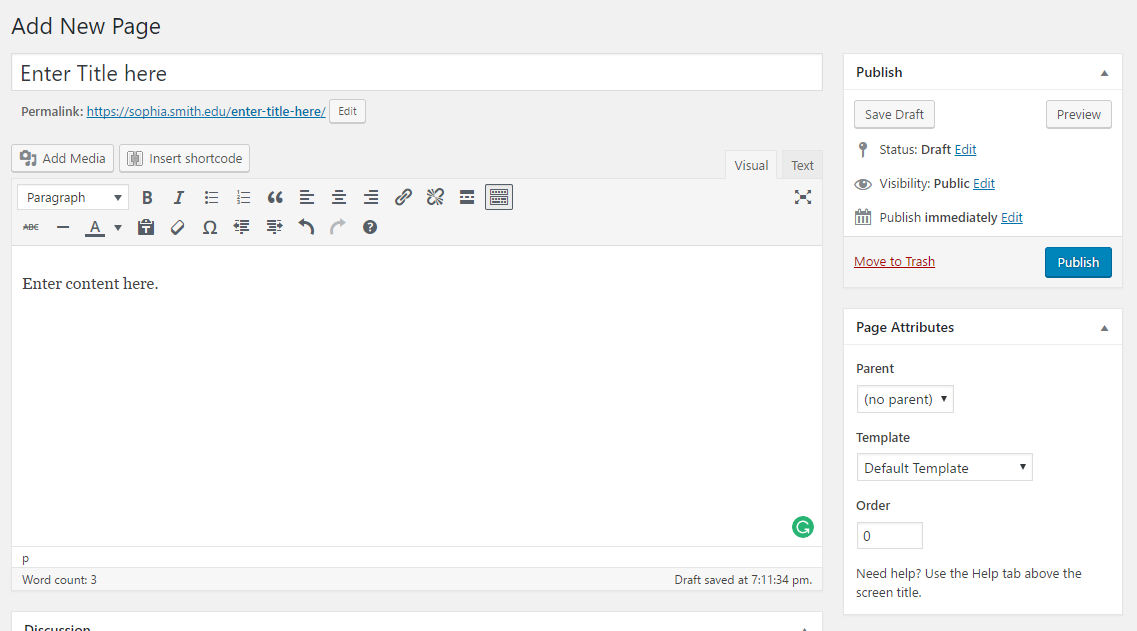
4
Note: If the page you are creating is a stand-alone page or the parent page, skip this step.
To create a parent-child relationship between pages, on the right side of the page, under the “Page Attributes” block, from the “Parent” drop-down menu, select the parent page of your new page. The new page will be considered the child of the selected page.
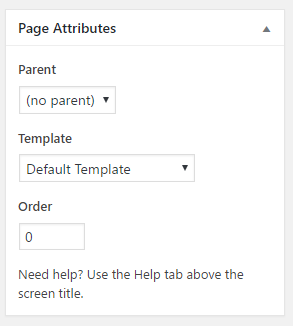
Setting up parent/child pages is useful if you want to organize hierarchical information. Then you can use other plugins such as “advanced sidebar menus” to display pages in their hierarchy.
5
To complete the creation of your page and publish it to the site, under the “Publish” block, click Publish. If you have not completed the page but want to save your progress, under the “Publish” block, click Save Draft.
Note: You can always come back to a page to unpublish it or to change the visibility. These changes are made from the “Publish” block.
We'd love your feedback!
Last modified: July 28, 2017